Silhouette Print and Cut Holiday Napkin Ring

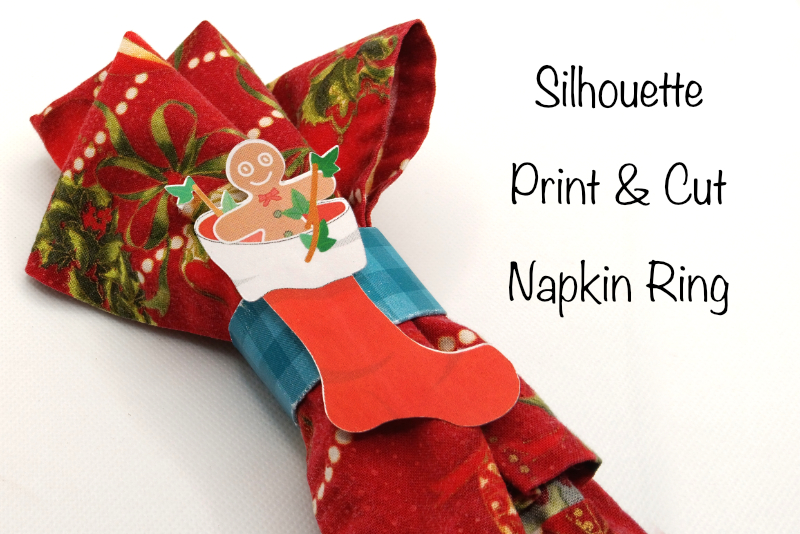
In this Silhouette Studio® tutorial, we will create a Print and Cut napkin ring for the holidays using your Silhouette Cameo®.
In the example napkin ring, I've used the Christmas stocking graphic that we created in a previous tutorial (see link below) for the detail graphic. Feel free to use your own graphic for the detail on top of the napkin ring. You will want to use the Pattern Fill feature for the other part of the napkin ring.
The Silhouette Cameo 5 was supplied to me by Silhouette America.
Silhouette, Silhouette Studio, Silhouette Connect, PixScan, Silhouette CAMEO and Silhouette Portrait are either registered trademarks or trademarks of Silhouette America, Inc. Product screen shot(s) reprinted with permission from Silhouette America®, Inc.
In the example napkin ring, I've used the Christmas stocking graphic that we created in a previous tutorial (see link below) for the detail graphic. Feel free to use your own graphic for the detail on top of the napkin ring. You will want to use the Pattern Fill feature for the other part of the napkin ring.
- In the PAGE SETUP panel, set the Machine to Cameo 5, Feed Type to Auto/Manual, Cutting mat to Cameo and Media Size to Letter (see screenshot).
- Open the Registration Marks panel and turn on the Registration Marks (see screenshot).
- From the top menu, click File - Merge and find you graphic. Place the graphic at the top left corner and duplicate the graphic for as many napkin rings as you will need. Do not overlap the registration marks (see screenshot).
- With the Rectangle tool, draw a rectangle that is 2 inches wide by 6 inches long (see screenshot).
- With the rectangle still selected, open the Fill Pattern section of the Fill panel (see screenshot). Click on the pattern of your choice to fill the ring (see screenshot).
- Duplicate this rectangle for as many napkin rings as you need. Do not overlap the registration marks.
- From the top menu, click File - Print to send your graphics to the printer.
- Place the printed graphics on to your cutting mat and load it in to your cutting machine.
- Click the Send button at the top right of the workspace. In the Send panel, make sure that each graphic has only one cutting line (see screenshot).
- Click the Send button at the bottom of the panel.
- Fold one long edge of the rectangle inward to the center of the rectangle (see screenshot).
- Fold the other long edge toward the center. The edges should meet in the middle. Glue in place.
- Glue .25 inch of the two ends together on the outside of the ring. We will cover this with the stocking (see screenshot).
- Glue the stocking graphic to the napkin ring over the closing (see screenshot).
Now we will add the stocking graphic on to the cutting area.
Now we will draw the other piece of the napkin ring.
The napkin ring will be 5.5 inches around and 1 inch wide.
Print and Cut Your Design
Assemble the Napkin Ring
The Silhouette Cameo 5 was supplied to me by Silhouette America.
Silhouette, Silhouette Studio, Silhouette Connect, PixScan, Silhouette CAMEO and Silhouette Portrait are either registered trademarks or trademarks of Silhouette America, Inc. Product screen shot(s) reprinted with permission from Silhouette America®, Inc.

Related Articles
Editor's Picks Articles
Top Ten Articles
Previous Features
Site Map
Content copyright © 2023 by Diane Cipollo. All rights reserved.
This content was written by Diane Cipollo. If you wish to use this content in any manner, you need written permission. Contact Diane Cipollo for details.


